An unsolicited testimony from satisfied Homeowner using EZ-Top
~ Ramona, in love with EZ Top
A friend recently asked me to help her as she finalized plans to remodel her kitchen while maintaining a budget. We quickly realized the main expense would be replacing her counter top. She wanted granite. As we discussed her budget, and the type of granite she wanted, she grew more and more frustrated. The expense of granite was simply out of reach. I suggested pricing a concrete countertop. Thrilled, my friend said she LOVED the look of concrete countertops yet she was confident a concrete countertop would be even more expensive. I offered to research local companies. Ultimately I ended up at Moon Decorative in Oklahoma City. Where I found a product named SS EZ Top. SS EZ Top a concrete hybrid, specifically made to cover existing counter tops without a messy, and costly, tear out. I left feeling like I’d discovered the best-kept secret in town and more importantly, a beautiful solution for my friend. She loved the look of the concrete countertops. Yet she still worried that she couldn’t afford to hire a professional concrete artisan/contractor for the installation. However, the cost of the SS EZ Top kit was affordable, and well within her budget. After discussing the SS EZ Top process with Moon Decorative staff, I offered to do the installation myself. But I still wanted to practice first and had the perfect desktop I knew I could use. After all, I knew I could, just didn’t want to take a chance with my friend’s kitchen. Later, I found out that this fear was totally not necessary! With complete confidence (in the product) and a bit of in trepidation in my abilities, I left Moon Decorative with an SS EZ Top Kit, anxious to get started on my little desk.
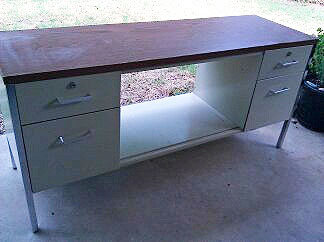
Old Desk
The first thing I did was watch the DVD (included in the kit), making a few notes on the instruction sheet (also included in kit.) The SS EZ Top kit is cleverly packaged in a large sealed bucket, with all the ingredients in individual, smaller containers nestled inside. The bucket and smaller containers are all re-usable.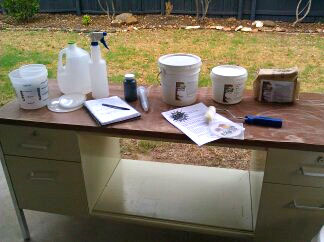
Before I began I filled a large bucket with clean, soapy water, and a small container as well. I gathered the items suggested on the instruction sheet as well as a notebook, pen, paper towels, a black marker, rags, a small disposable cup, silicone spatula, and plastic containers. While watching the instructional DVD earlier I’d highlighted certain things on the printed version and then I stuck it in a protective plastic sleeve to keep it clean. Just in case things got messy!
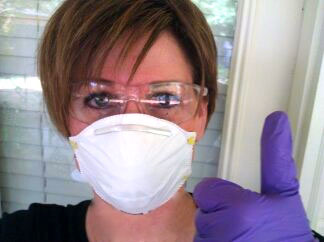
I was ready to begin. Safety first, always. Dust mask, gloves, protective eye wear. The kit will cover approximately 60 square feet. I put plastic under the cabinet and covered the sides of the cabinet with plastic, too. I documented everything I did, so I could recreate the process, as well as make any changes if necessary.

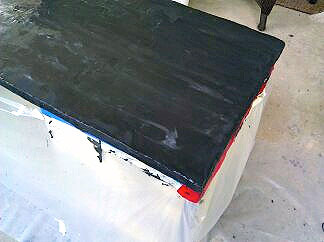
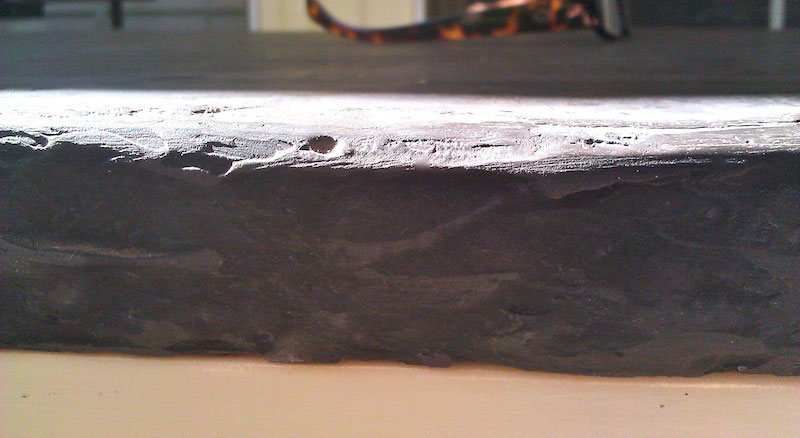
Deck Protected and Coated
I’d never used a belt sander before, and on my first attempt I was glad no one was around to watch as the sander semi-pulled me across the counter top. A moment worthy of I Love Lucy or America’s Funniest Home Videos. Note to self: Turn the sander on, and then make contact with the surface. Don’t start with the sander sitting on the surface. Oops. Yep. That left a pretty big scratch on the top…. Hmmm. Wonder if that will be a problem? Guess I’ll find out…..
Next step. Dilute the SS Concentrated Polymer. Two parts water to one part Polymer. I combined them in one of the small containers with measurements on the side. Instructions indicate “Spray, roll, or brush a thin coat….save the unused solution in a clean airtight container.” I poured a small amount into a spray bottle, labeled the container and the bottle “Diluted Polymer” and snapped the lid on the container. The diluted polymer is very thin, almost like water. I used the spray bottle to spritz the top with the diluted polymer, then a paint brush to spread it. I put the brush in the small container of soapy water for clean up later.
Fifteen minutes later and I was ready to do the Base Coat. The instruction sheet said two quarts Base Coat powder stirred into 24 ounces of diluted SS Concentrated Polymer will cover about 16 square feet. I didn’t need that much, so I decided to decrease the amount I mixed. As I was calculating the amounts to combine I realized I felt like I was reducing a recipe. I jotted down my calculations and went for it! (I followed the instructions and kept my gloves, eye protection and dust mask on as suggested.) I mixed the base coat in one of the larger containers I purchased. I used the bathroom cup to scoop the base coat powder out of its original container. After I achieved the pancake batter consistency I added the integral color. I chose black. I wanted the top to look as much like slate as possible. Again, I felt like I was in the kitchen, mixing a cake. I remembered to write down the amount of color I added. As I poured the mixture on the counter top I could immediately tell it was user friendly. I used the larger trowel first. I applied different pressure, took long sweeping strokes, then shorter strokes, moving the trowel in lines and curves, as I began to get a feel for how to manipulate the base coat. At one point I accidentally dropped the trowel right in the middle of the top causing a large indentation in the smooth base coat. I lightly sprayed the area with the diluted polymer and smoothed the indention away without a problem. The scratch I made with the belt sander didn’t show either.
The Base Coat
My friend wanted a rough or “raw” edge on her kitchen counter top, so I decided to see if I could work with it to begin to form a raw edge. I’d previously taped directly underneath the edge of the Formica, but on the front of the cabinet I needed to deal with the drawers. I pulled the drawers partially out, and put plastic inside them. I’d already “pulled” the base coat over the edges, using one trowel held horizontally underneath the edge of the laminate, and the other smaller trowel to drag the base coat over the edge. Once more, EZ TOP is incredibly user friendly. When I was happy with the smoothness of the Base Coat the trowels went into the large bucket of soapy water, as well as the Base Coat mixing container. Ready to work on the edges I used the small end of the silicone spatula. I gently applied pressure, “drawing” long lines to create the rough edge. When I was through I gently closed, then reopened, the drawers to make certain I hadn’t pulled the base coat too far down. Perfect! I washed my tools and waited.
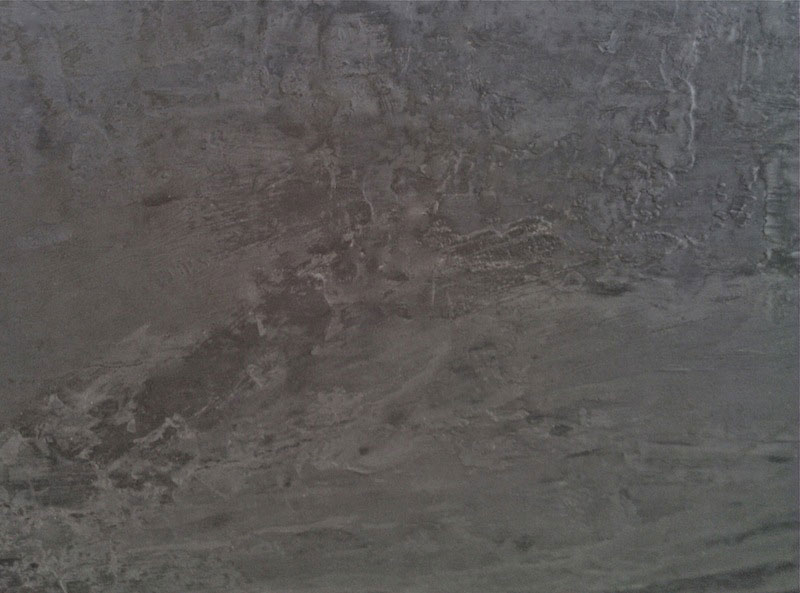
Surface Close Up
The following day I ran my hand over the newly dried top and was surprised at how smooth it felt. Just a few spots here and there to lightly sand, then clean the surface with a brush, cloth, vacuum, apply a light coat of polymer and 2nd Base Coat. Using the same calculations from the day before, I mixed the Base Coat powder and polymer, and added the color. I was happy with the tone. A repeat of the day before, except this time I allowed my creative side to lead even more. Holding the trowel away from the top I would move my arm in a sweeping gesture before I actually made contact with the base coat. I tried lifting the trowel straight up, or stopping and moving backwards, sideways, etc. to note the results. I wanted to create a surface with movement, like natural stone. I worked (really, I played!) long enough that a few spots began to get a little dry. I used the spray bottle of polymer to smooth things, added a few more touches to the rough edges, cleaned my tools and waited for the next day!
Top Surface Detail
After sanding and cleaning the surface again I mixed the Top Coat Powder and diluted polymer. I made the same adjustments in quantity as I’d made with the Base Coats. I expected the Top Coat to be very much like the Base Coat. It is much smoother. To use another cooking analogy I felt like I was icing a cake. Smoothing the Top Coat with the trowel didn’t feel like “work.” It was fun. I loved the way it would move and glide under the trowel. Working with the Top Coat felt organic: there is a wonderful “flow” to it. I was able to move it around and manipulate it easily into the look I desired. The final step was the sealer. Simple and straight forward.
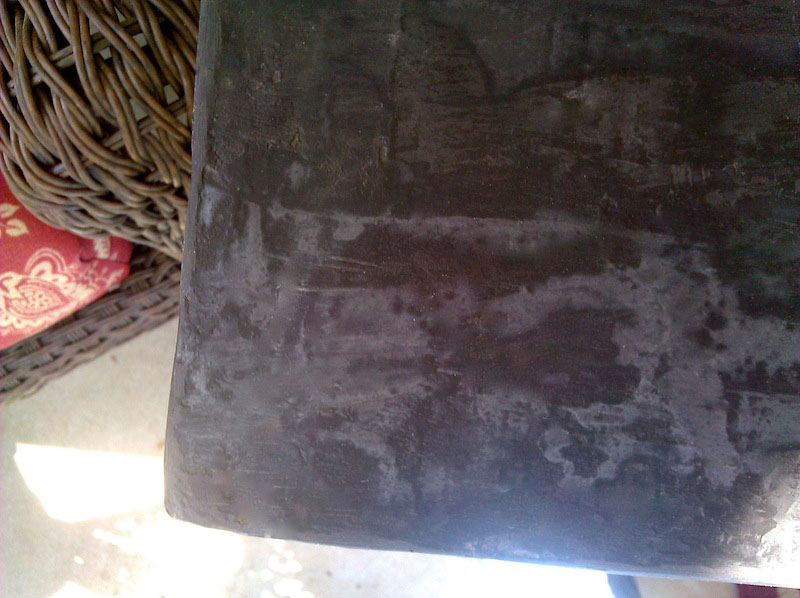
Corner Detail
I couldn’t wait to show my friend. I can’t wait to do her kitchen. SS EZ Top is incredibly user friendly, and the finished product is beautiful. Be brave. You don’t have to be a professional to install SS EZ Top. All things considered: cost, unlimited color choices, ease of installation, no need to tear out existing surfaces, and an incredibly beautiful finished product make it undeniably one of the top products on the market.